Pate Brisee, a.k.a pie crust is a wonderful pastry dough that has many uses ranging from sweet and savoury pies to buttery quiches.
There are many variations of this recipe but most use the same 4 ingredients: butter, flour, salt and water.
Having a solid pie crust recipe is useful for any home cook, (especially around the holidays) and this recipe doesn’t disappoint. Although to really nail this recipe, there are a few crucial tips that I’m outlining below.
What is Pate Brisee Used For?
If you’ve ever had quiche or apple pie, then you’ve enjoyed pate brisee. It’s essentially the french term for what we call pie crust.
Pate brisee is a pretty universal dough that can be used for both sweet and savoury dishes. Unlike pate sucree, or pate sablee, this dough doesn’t contain any sugar. Because there’s no added sugar, the end result is a pie crust that’s more buttery and flakey instead of cookie-like. This makes pate brisee ideal for items that will be served warm like quiche and pies.
Differences in Flour Strength
This recipe for pate brisee is from the awesome people at ChefSteps.
I’ve changed the recipe slightly to be used with more widely available all-purpose flour. This is because it’s almost impossible to find bread flour here in the Netherlands. I’ve also developed this recipe to work with a food processor instead of a stand mixer.
ChefSteps recommends using bread flour because it’s more consistent compared to all-purpose flour which can vary in gluten strength. Flour in the Netherlands and U.K. is much different in strength than flour produced in the U.S. and this can make it difficult to provide a recipe that works for everyone.
As all-purpose flour absorbs less water, my advice is to not add all of the water at once. You’ll want to get a feel for what your flour can handle so just add enough water until a smooth dough is formed.
It’s best to follow this method each time you make the dough because flour hydration levels can change based on the time of the year or with a different brand.
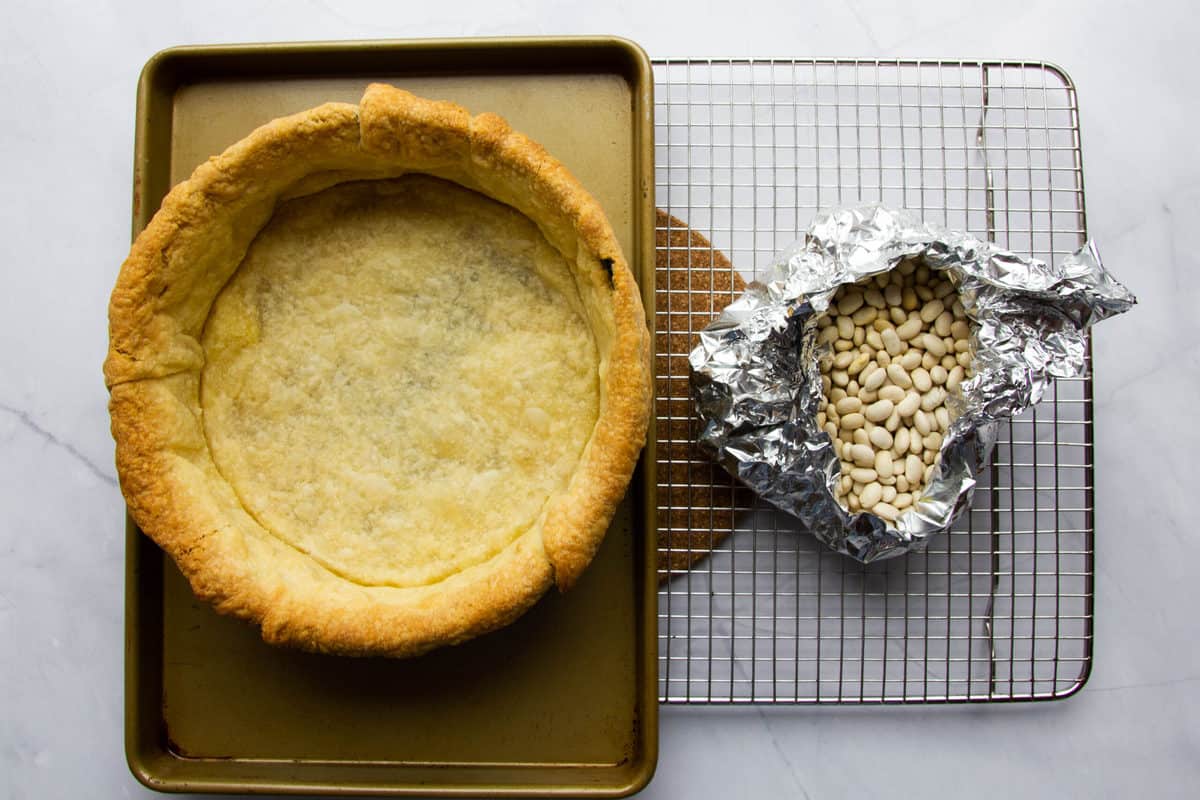
Do I Need to Blind Bake My Pate Brisee?
Blind baking simply means pre-baking the dough before adding the filling.
Sometimes dried beans, rice or weights are used with paper to prevent the dough from rising unevenly. I blind-bake almost all my pies and tarts because it helps to keep a better final shape and seal the edges.
Blind baking is essential if you’re adding a filling that won’t be cooked like in a fruit tart or using a liquid filling that can leak out the sides.
Without blind baking, the dough may also rise unevenly which will make an uneven pie.
How to Avoid Cracks in Pate Brisee
Cracks in the tart mean that the dough is slightly underworked or there’s not enough water.
If you’re rolling out your dough and it’s full of cracks, add a few splashes of water to the dough and roll it into a ball until the dough is smooth again (be careful not to overwork it too much here). Roll it out again and it should be much better.
A few cracks in the dough are not a big problem. Just patch these up with some extra pie dough and try your best to smooth them out.
How to Prevent Pie Dough From Shrinking
A shrinking crust is caused by gluten development in the dough and there are two ways to prevent this.
First, the dough must be kept as cold as possible while mixing to prevent the gluten from forming.
Secondly, the crust must be rested long enough to allow the gluten to relax.
If your pie is shrinking after baking, it means the dough wasn’t rested long enough or it was overworked.
Why Do Some People Add Vinegar to Pie Crust?
Adding vinegar or lemon juice to pie crust is an old-school method that was previously thought to make pie crusts more tender.
Although today, there is not much scientific evidence to support this, some bakers still swear by it. At the very least, a splash of lemon juice added to the pie crust may add a nice lemon flavour to the dough.
Tips to Nail this Pate Brisee
- Don’t rush this recipe. The pie crust needs time to rest to prevent shrinkage and cracks from forming in the dough.
- Keep the dough as cold as possible. Freezing the butter and using ice water will prevent gluten development. This will make a more tender crust and prevent shrinkage while baking.
- Use a scale. Pastry requires accuracy to have consistent results. Measuring cups are not very accurate so use a scale for the best results.
- Make more dough than you need. The easiest way to mess up a pie crust is to have not enough and stretch it too thin. This batch gives you more than you need to make an even layer across a 10″ pan and you can freeze the dough scraps for a second use.
Buttery, Flakey All-Purpose Pie Crust – Pate Brisee
Equipment
- Rolling Pin
- Pie weights (dried beans or rice)
Ingredients
- 205 g butter
- 250 g all-purpose flour
- 3 g salt
- 40-55 g ice-cold water
Instructions
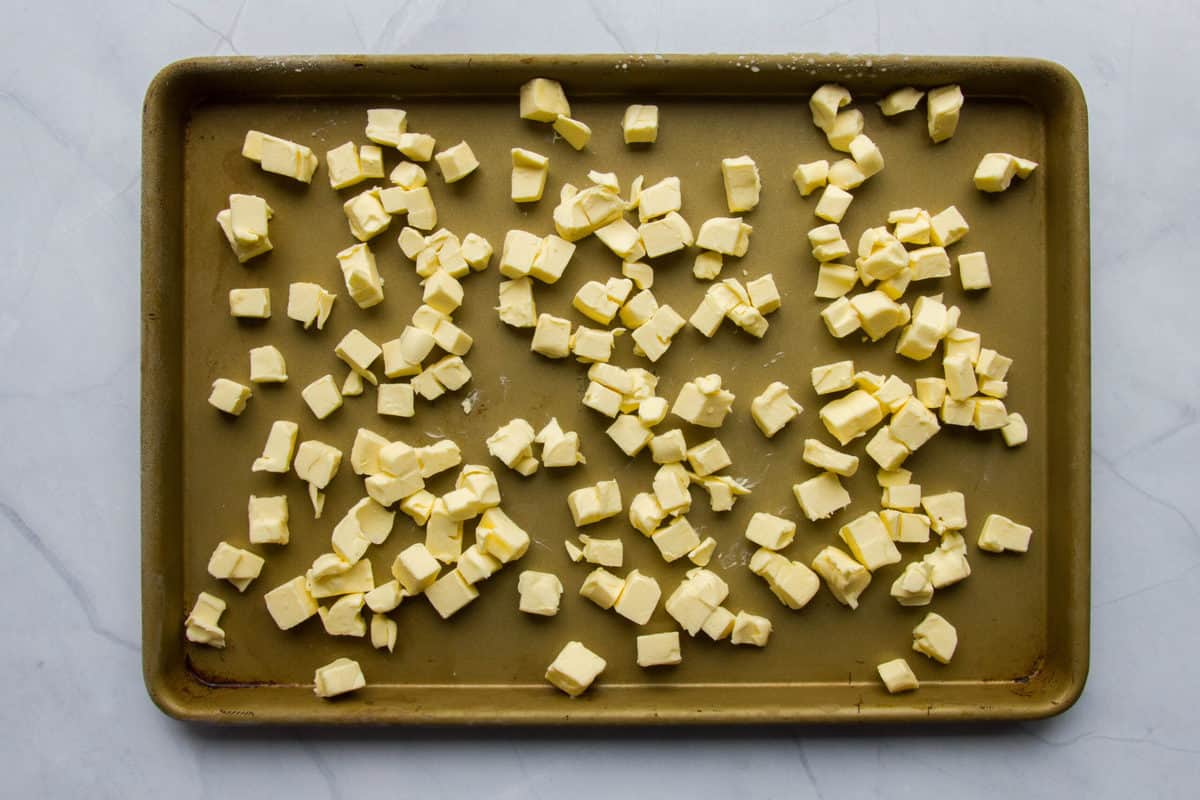
- Cube the butter into tiny cubes. Place on a tray and freeze for 20-30 minutes. Also, place the flour and salt in a bowl in the fridge.

- In the food processor, add the cold cubed butter, then the flour and repeat until everything fits inside. Pulse 10-15 times or until the butter is about the size of a pea. (You can see in the picture I pulsed a little too finely, but it will still be okay).
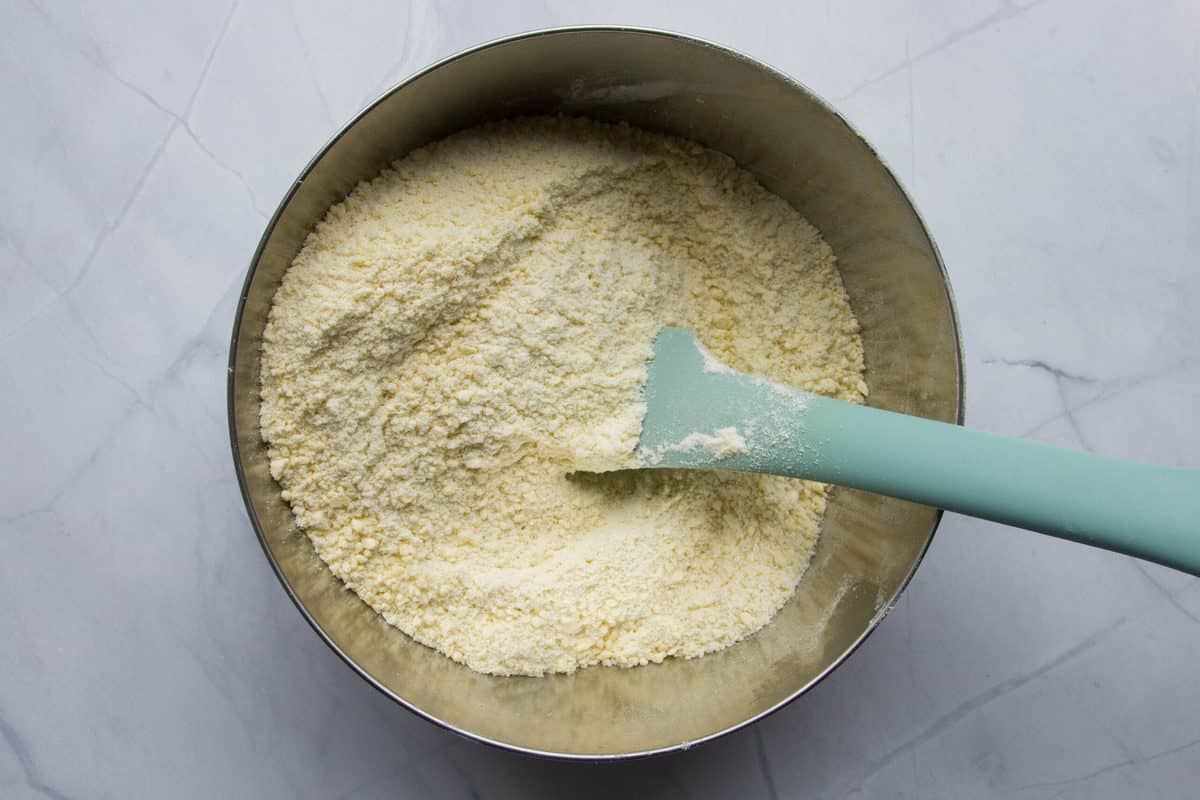

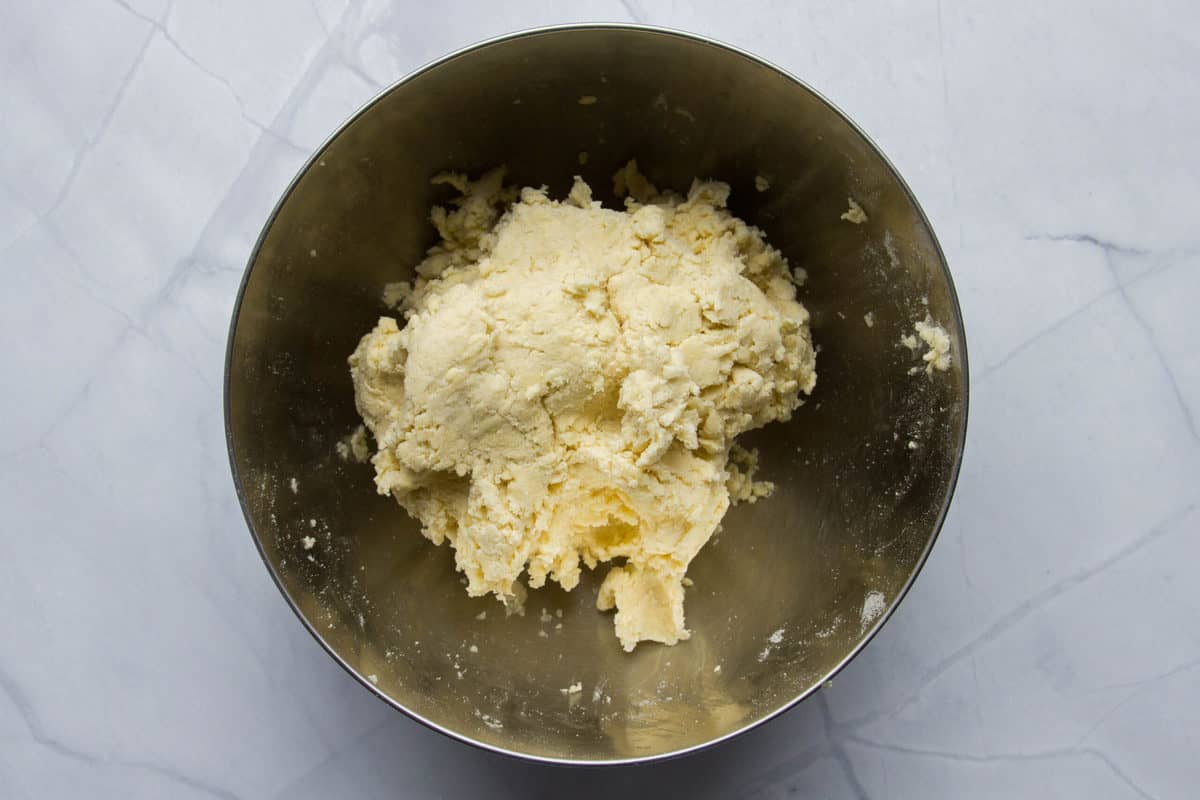
- Transfer the butter/flour mixture to a bowl. Fill a small measuring cup with ice and water. Place the butter/flour mixture on the scale and tare to 0. Start with 40g of cold water and mix with your hand. You want a smooth dough that's not sticky. If it's still too crumbly then add more water and if it's too sticky add more flour. Try not to overwork the dough but it should be smooth and hold together.

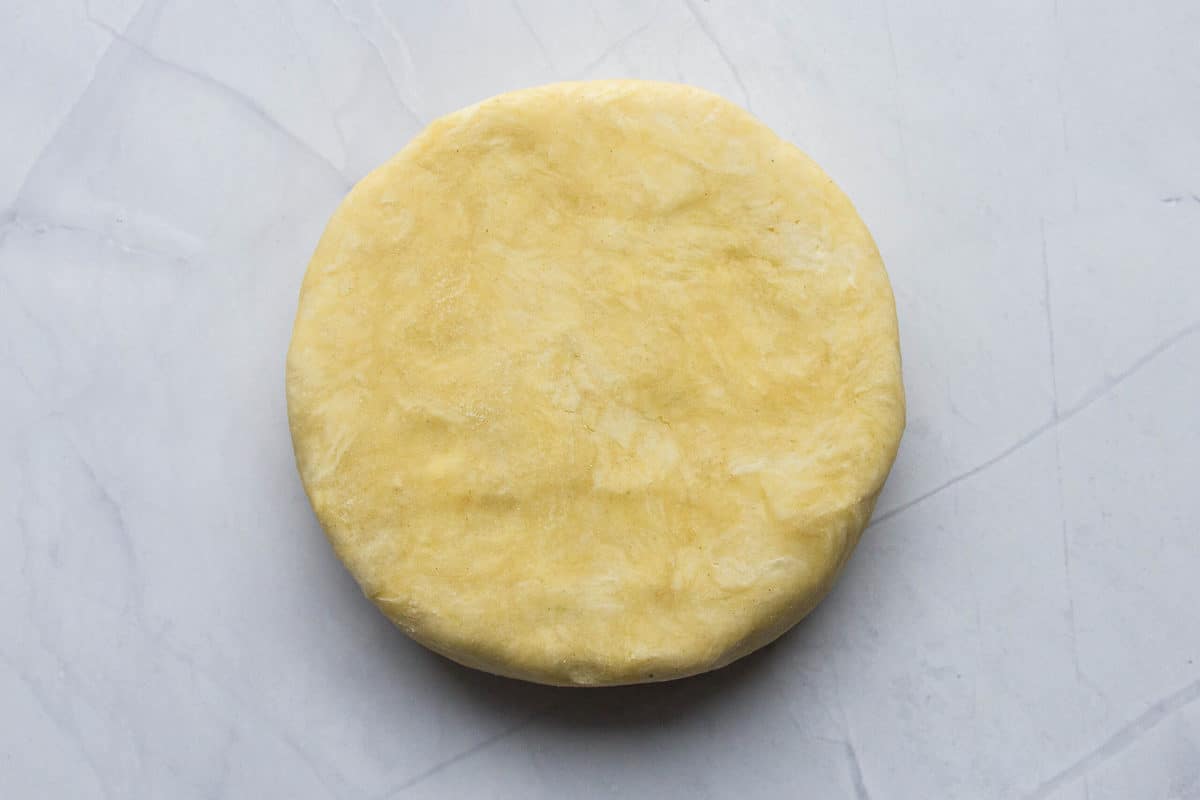
- Once a nice dough has been formed, press into a flat disk. Make sure there are no cracks, otherwise you'll want to work it a little longer. Wrap with plastic wrap and chill in the fridge for at least 4 hours or ideally overnight.

To Blind Bake (Optional)
- Remove the dough from the fridge and roll out on a large floured surface. You'll want to turn the dough a quarter after each roll and flip it occasionally to get an even layer. Roll the dough out until you reach about 3mm in size (a rather thick pie crust).
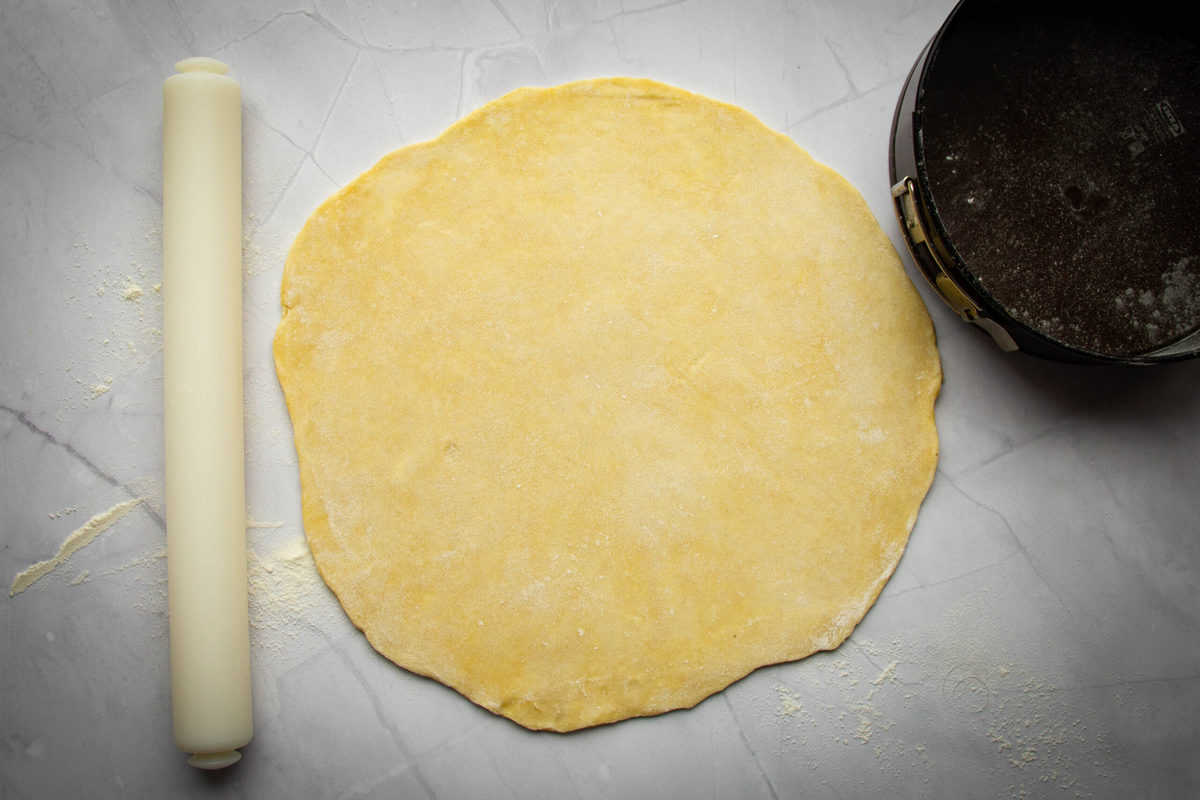

- To lift the dough without breaking it, roll it up with the rolling pin and lift.
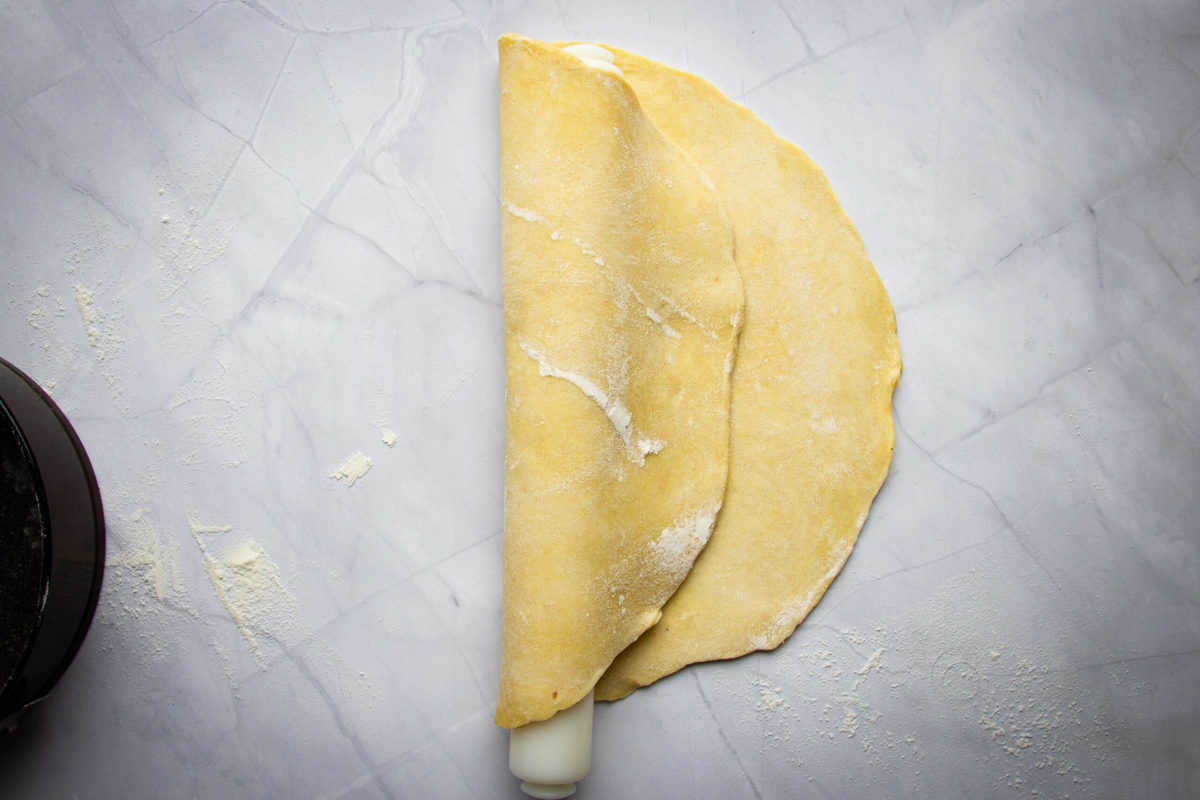

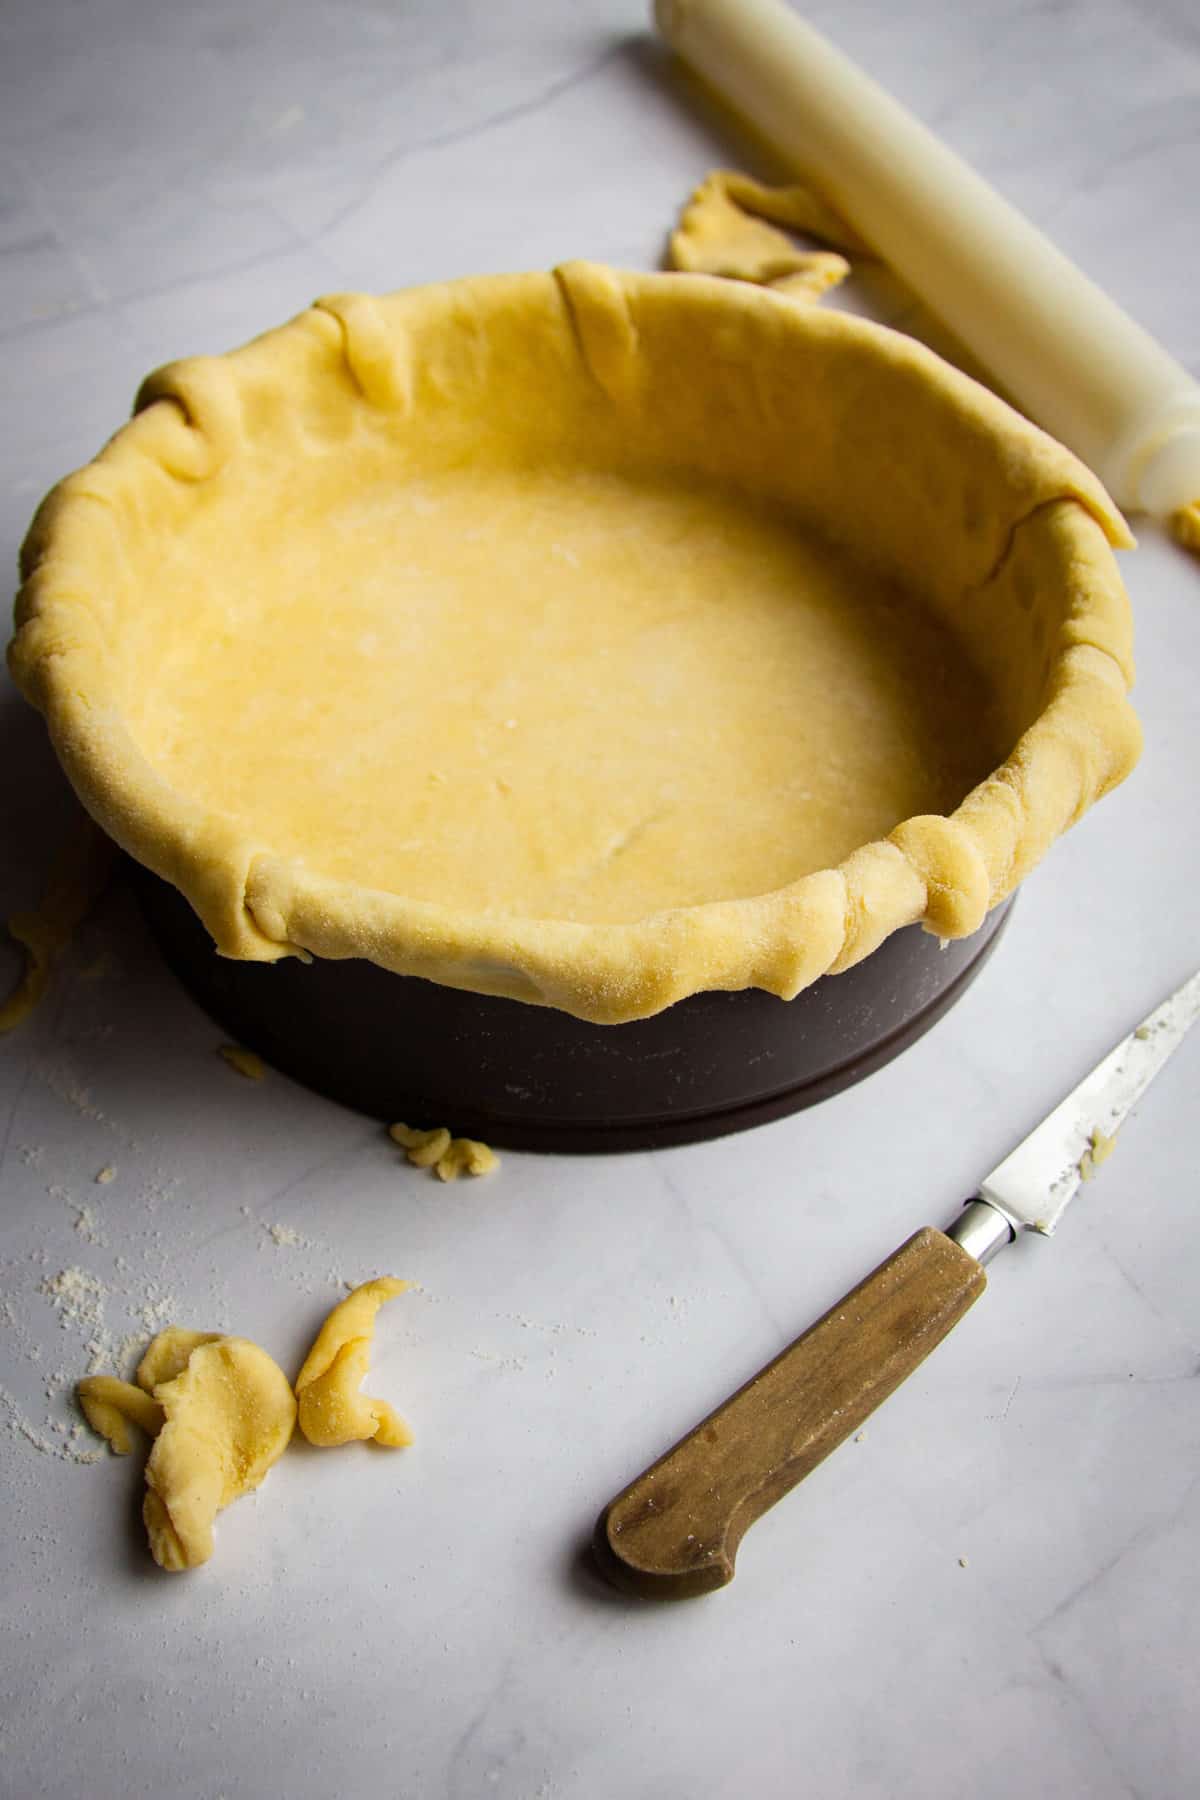
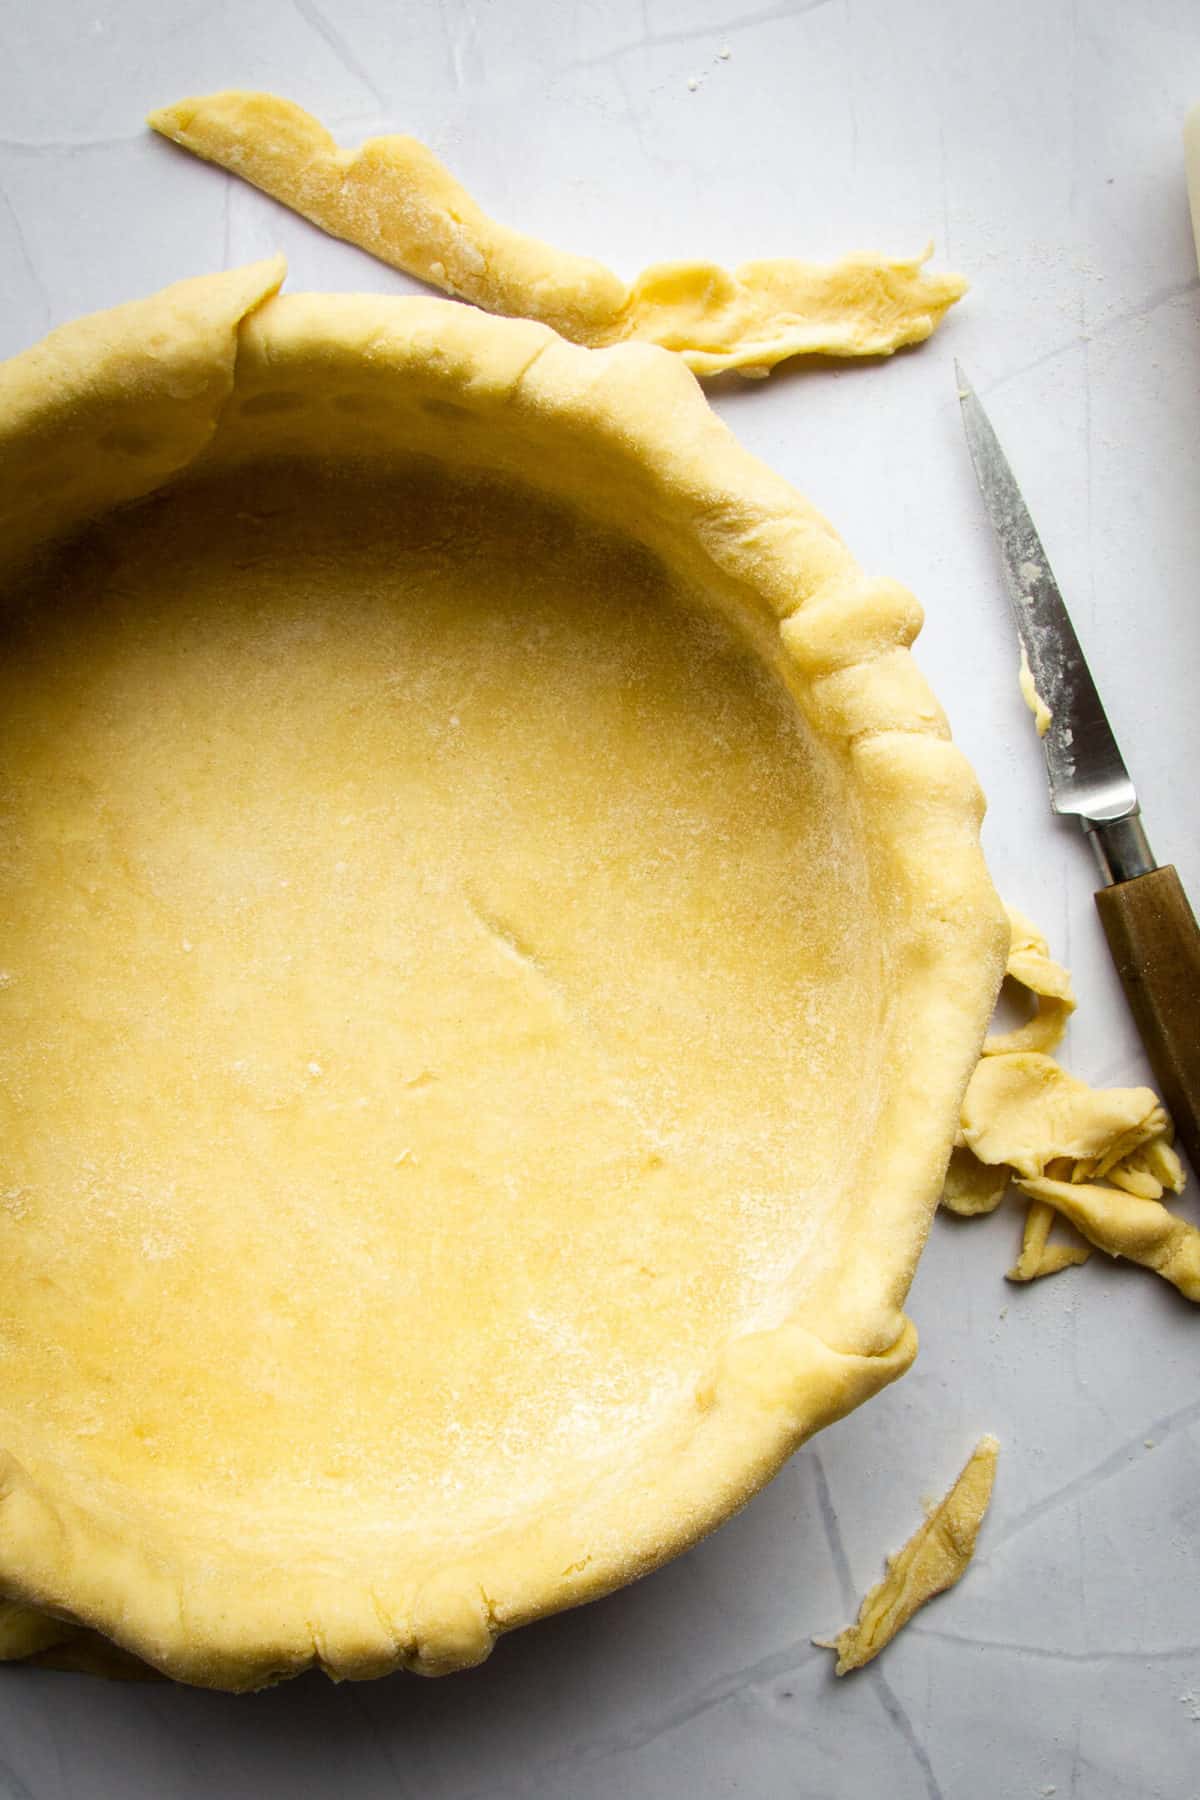
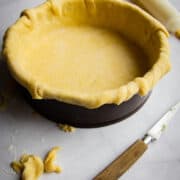
- Lightly flour the cake pan and carefully lay the dough inside the pan. Make sure the edges touch the bottom but don't press too hard.Allow the edges to hang over the sides.
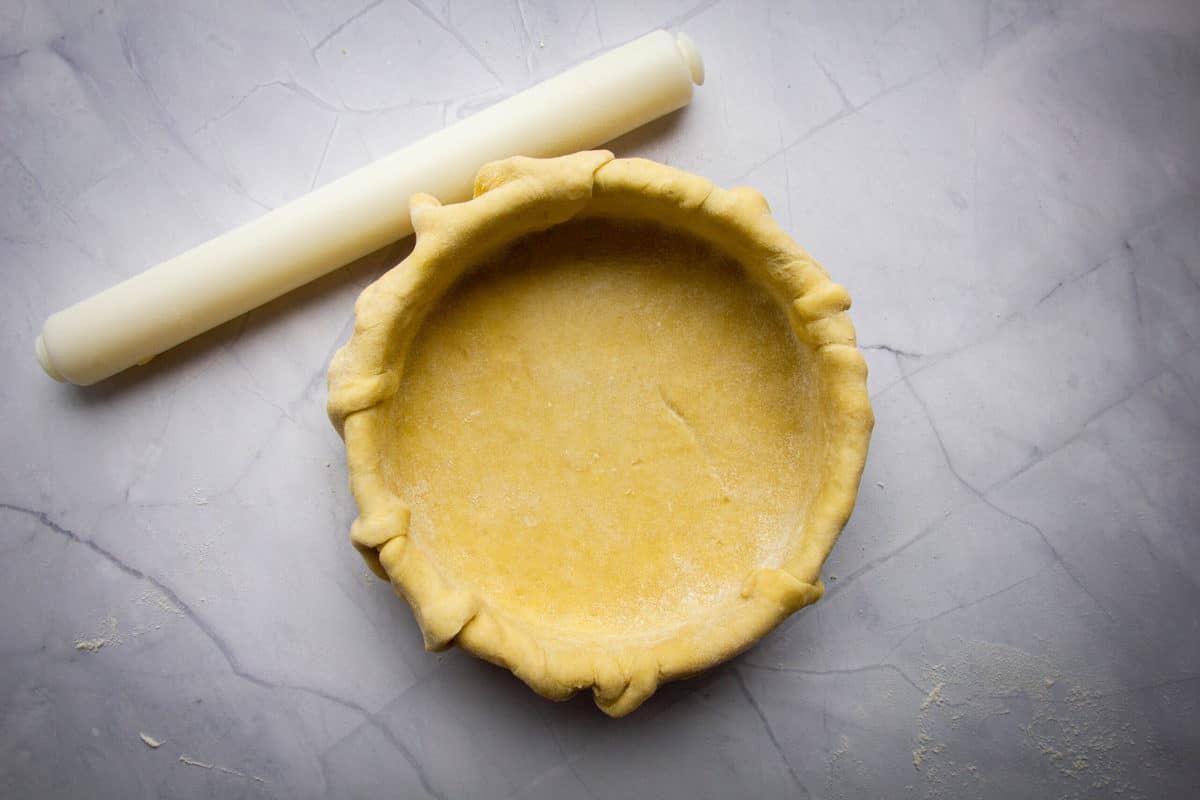

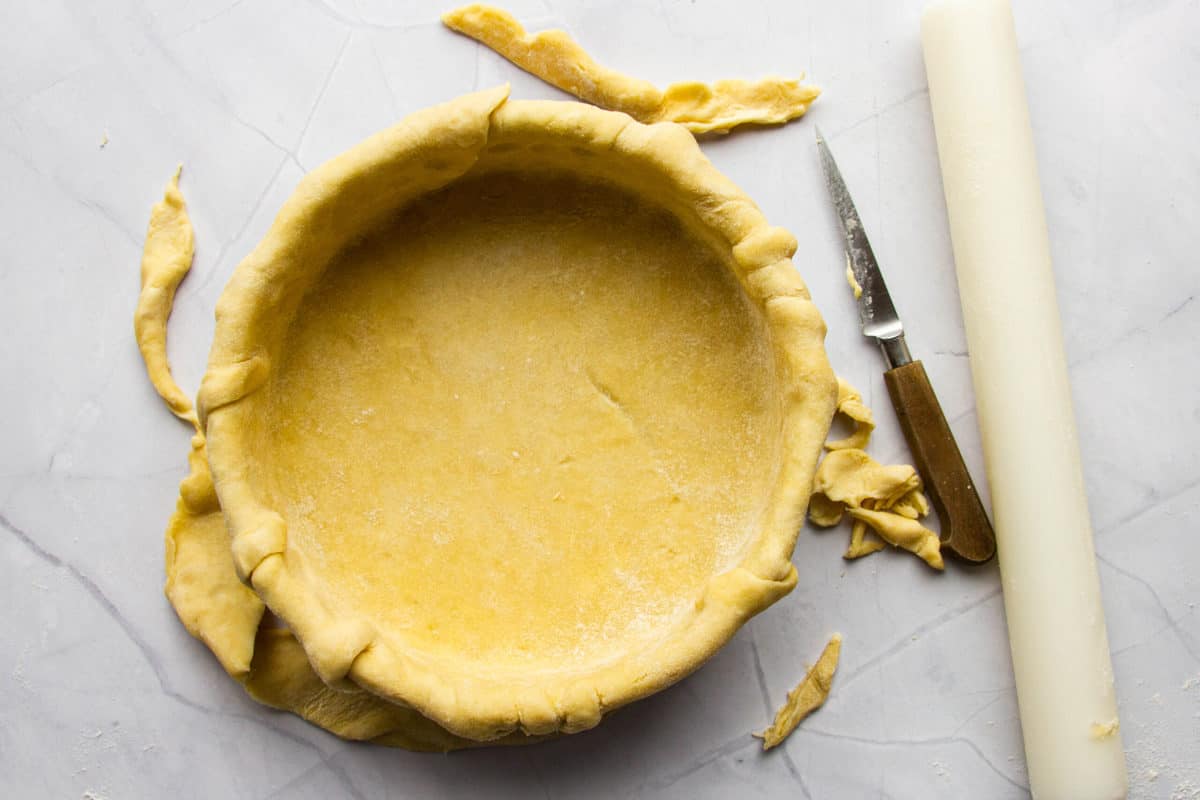
- Trim the edges with a small knife to remove the excess pie crust.

- Let rest in the fridge for one hour, uncovered.(You can also rest it overnight in the fridge, but then it should be wrapped with plastic wrap).
- Preheat the oven to 400°F/200°C. Weigh the pie crust down with some beans in tin foil (this will prevent the dough from rising unevenly).
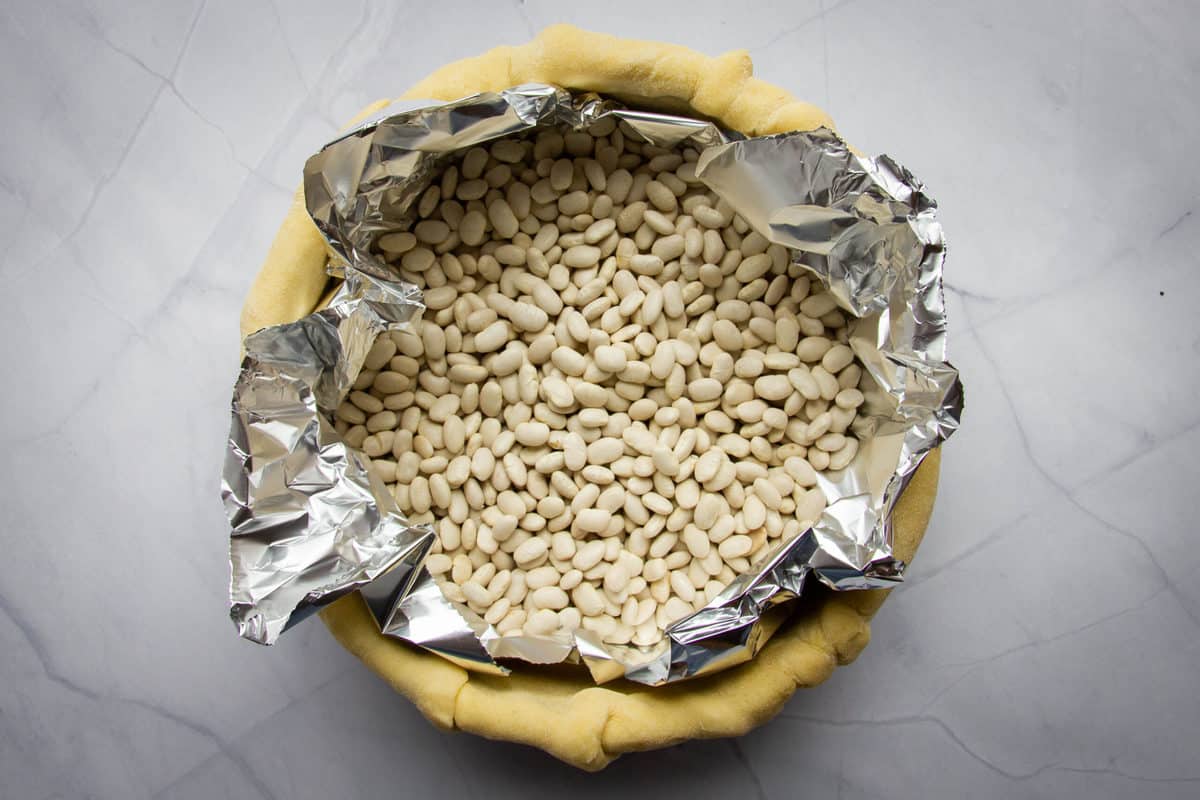

- Bake for 20 minutes at 400°F/200°C. Remove the beans and tin foil and finish for another 5 minutes to seal the bottom of the pie.You can now fill this with whatever filling you'd like!

Notes
More Recipes

My Ultimate Sticky Toffee Pudding

Contents
- What is Pate Brisee Used For?
- Differences in Flour Strength
- Do I Need to Blind Bake My Pate Brisee?
- How to Avoid Cracks in Pate Brisee
- How to Prevent Pie Dough From Shrinking
- Why Do Some People Add Vinegar to Pie Crust?
- Tips to Nail this Pate Brisee
- Buttery, Flakey All-Purpose Pie Crust – Pate Brisee
- More Recipes